In 2011, I spent a significant portion of the year working in the San Luis Valley around Alamosa in Southern Colorado and quite a few of my images reflect my time spent in that area of the state. However, I continued to explore the wild spaces around “home” in the central mountains of Colorado. It seems every time I go hiking in the wilderness that is right outside my backyard, I see more spots off the beaten track that I want to explore. Just the mountains of Central Colorado could keep a hiker busy for a lifetime, not to mention all the other backpacking opportunities that abound in the American West! I typically shoot landscapes, but I included a few images of backcountry skiing and snowboarding. The majority of my skiing in 2011 year was around the Wolf Creek Pass area on the Eastern side of the San Juan Mountains but I did make it over to Silverton where the mountains are so big and rugged I imagined I had been somehow magically transported to Alaska!
Architecture
Top of the Rock – Manhattan Light
New York City really is a city of lights. During my trip to New York last fall, I wanted to get a night photo of “The City,” using the city’s lights to show how incredibly large the metropolitan area is. I thought about going to the observation deck at the Empire State Building, but heard it was challenging to take a good picture from there because the metal safety screens surrounding the observation deck obscure the view. Also, with the Empire State Building being one of the most recognizable buildings on the New York skyline, I wanted to include this iconic structure in my photo. So, I ended up heading to the observation deck at Rockefeller Center. The lower level of the observation deck at the “top of the rock” is glass, but even better, the upper level offers completely unobstructed views.
To prepare for the shoot, I went on Rockefeller Center’s website and couldn’t find anything regarding restrictions, so I think “Sweet! I’m bringing my tripod!” Unfortunately, once purchasing the tickets in the lobby that night, in huge bold letters on the ticket, it said “No Tripods Allowed.” I’m thinking, “How can I get a sharp image in such low light without my tripod!?!” I decided to nonchalantly carry my tripod up to the observation deck (I had been carrying it around Manhattan all day), and if the opportunity presented itself, I’d thumb my nose at authority in pursuit of a sharp image. I stayed away from the crowded areas of the observation deck and it turns out, the security guards turned a blind eye to me and my tripod!
What an incredible view! Bathed in blue and red light, the Empire State Building is easily recognizable. Off in the distance to the right of the Empire State Building, you can see the new World Trade Center. Also, you can see the incredibly bright Times Square on the right side of the frame.
Looking North from Rock Center, Central Park stands out as a dark patch in the landscape of lights that merge with the horizon.
It was a brief trip to New York, but I thoroughly enjoyed my stay in America’s largest city. I can’t wait to visit again!
New Year’s Resolution
One of my New Year’s resolutions is to learn Photoshop. I’ve been serious about photography for over five years now, so I’d say I’m long overdue to take the plunge and join the “dark side” of photo editing. I avoided learning Photoshop for so long because I was honestly too lazy to learn new software and I was put off by the cost. I also avoided using Photoshop because of the sometimes negative stigma associated with photography and “photoshopping.” The fact of the matter is every professional photographer, and most serious hobbyists for that matter, digitally re-touch their images. Photoshop is simply the best (and most expensive) editing program out there. Truth be told, I have been re-touching my images for several years now using Adobe Lightroom and plugins like Nik Efex. With these programs, and now with Photoshop, my goal is not to create unrealistic images, but to further improve the images I do take and to help overcome the limitations of my camera gear.
To demonstrate the limitations of even my high end camera system, have a look at this series of pictures of the Capitol Building in Pierre, SD. Below, in the first image there are two major issues that stand out to me: First, by focusing on the rock at the bottom of the frame, the Capitol and grounds are blurry because my camera can’t keep both the close up rock and far away capitol building in sharp focus. In fact, even with a wide angle lens, the focus zone is so small that the rock sticking out of the water on the right middle of the frame is already out of focus. Second, by exposing for how much light the rock needed to be properly lit, the capitol and grounds are overexposed and in the case of the capitol building, so overexposed there is no detail in that area, just pure white. After all, cameras are just machines and can only record so much of a range of light, much less than the range we see with our eyes, and I have exceeded that range with my camera in the image below.
In the next image, I focused on the capitol building and also set the camera’s exposure so the capitol dome would be properly exposed. I now have the same problem as in the first image but in reverse: Now the rock in the foreground is blurry and also very much underexposed.
Now here is where Photoshop comes into play. I loaded the two above images into Photoshop and used layer masking to merge the properly focused and exposed capitol and grounds picture with the properly focused and exposed rocks in the foreground picture to make a single properly exposed image with sharp focus in both the foreground and background.
The above example shows a relatively extreme case of my exposure woes. In practice, I always carry a variety of filters that I place in front of my camera to help control the dynamic range of a scene. Sometimes, as in this case, using filters is not ideal or is still be insufficient to control the dynamic range of a scene. Even though I prefer using filters in the field to correct exposure, obtaining “front to back” sharpness in an image is a chronic challenge. With Photoshop, I will now overcome!
I don’t believe that by learning Photoshop my landscape images will become fake and from my imagination alone. Instead, I look forward to using it to correct the limitations of my camera and gear and ultimately present an image that is more pleasing to view and is still true to the scene I actually photographed.
2010: A few long trips into the mountains (and elsewhere).
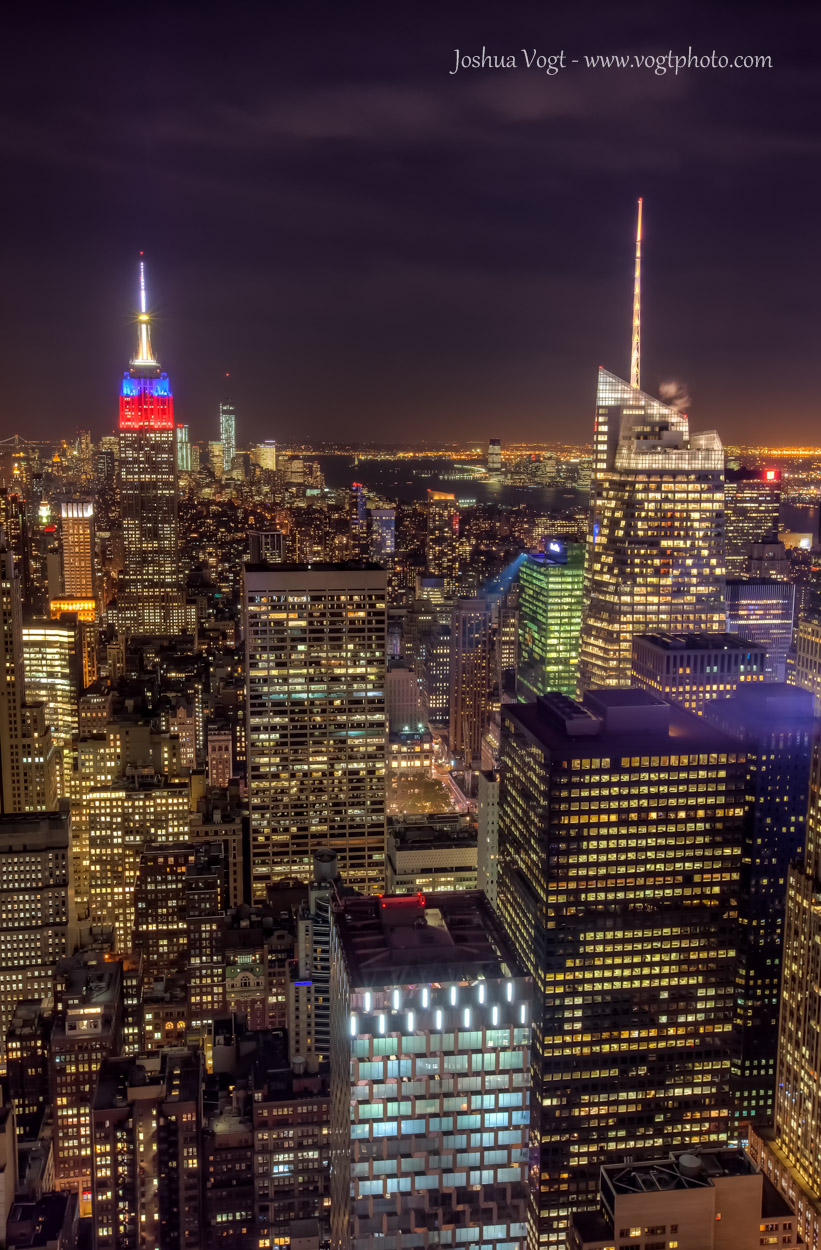
2010 was a wild year for me. After more than two years in the Vail Valley, I moved to Glenwood Springs to be closer to the construction project that I was promoted to manage. Unfortunately, the new project and responsibility left little time for hiking and photography. Even though I did not have as much free time as I would have liked, I was able to sneak away from civilization for a few longer backpacking trips. In one trip, I hiked Mount Sopris, near Carbondale, Colorado, and followed the 12000 foot high Elk Mountains Ridge from Mount Sopris all the way South to Capitol Peak. Four days, thirty miles and twelve thousand vertical feet of hiking later, my black lab Sally and I emerged at the Capitol Peak trailhead where my roommate had kindly stashed my truck for me! Another memorable hike of the Summer was over the Fourth of July where I hike nearly thirty miles to the headwaters of the Piney River in the Gore Range, crossed West Booth Pass and descended the Booth Creek drainage ending my hike near Vail. During that hike, I had a very close encounter with a friendly mountain goat and spent the night of Independence Day curled up in my sleeping bag hunkered down in my tent during a snow storm! I lucked out in the Fall when I visited the Kebler Pass area near Crested Butte and the McClure Pass area near Marble during the height of Fall colors. Of course, when winter set in, I spent as much time as I could sliding down the local mountains on my skis. Even though I wasn’t able to get out into the wild as often as I wanted, I was very productive with the free time that I did have! What a great year!
Lake Charles and Mystic Island Lake sit at the head of East Brush Creek; a creek that finds its source in a cirque with towering 13,000′ peaks surrounding the valley. The scale of the image above is impressive. More than a mile separates Lake Charles (in the lower right of the frame) and Mystic Island Lake (in the upper left of the frame).
Black Tooth Mountain and Ripsaw Ridge are reflected in a small pond northwest of West Booth Pass in the Eagles Nest Wilderness outside Vail, Colorado.
A curious goat says hello deep in the Eagles Nest Wilderness north of Vail, Colorado.
A lone tree clings to life in the Utah desert somewhere along a lonely highway.
The desert is alive! Insect tracks crisscross a windswept pattern in the sandy landscape near Lake Powell in Glen Canyon National Recreation Area.
Even though a large portion of the Colorado high country is now protected as Wilderness, the land was not always held in such regard; the results of past clear cut logging are still clearly visible decades after this area, near 14er Huron Peak, was protected.
The great thing about Colorado is almost every town in or near the mountains is incredibly scenic. I took this photo of a clearing storm from from the sidewalk in front of city hall in Parachute, Colorado; no hiking involved!
Decaying remains of an old homesteader’s cabin sit right alongside the highway North of Meeker, Colorado. I drove by these remains this fall and this interesting window has deteriorated greatly in just the three years since I took this picture.
A clearing storm is lit ablaze by the last rays of sunlight high above Wall Lake as seen from Trappers Peak, deep in the Flat Tops Wilderness.
Puffy Clouds drift by a small pond surrounded by a grassy meadow on top of the plateau southwest of Trappers Peak in the Flat Tops Wilderness of Colorado.
One must follow a rough 4×4 road into the mountains outside Marble, Colorado for more than six miles to reach this landmark. To see a structure so old in such a remote place is really something special. Unfortunately, as beautiful as the Crystal Mill is, it stands a reminder to me of man’s zeal to exploit nature; even in the most remote and beautiful of places.
A fiery sunrise and fall color combine to create a scene to remember at the often photographed Crystal Mill, deep in the Elk Mountains.
An interesting cloud forms over a lone tree on top of Arkansas Peak with the massive Treasure Mountain looming in the distance.
A slowly decaying fence stands alone on the vast South Dakota prairie.
A Capitol Morning – Pierre, South Dakota
The final stop on my road trip moving from south Florida to Wyoming was in my childhood home of Pierre, South Dakota. Although the main purpose of the trip was to visit family, but I did manage to slip out before sunrise one morning and photographed the capitol building.
Sadly, the sunrise wasn’t anything to get excited about, but I still took a few images I thought were worth sharing…enjoy!
Gateway Arch – St. Louis, MO
The Gateway Arch, also called the St. Louis Arch, stands an impressive 630 feet tall. In fact, the Gateway Arch is not only the tallest building in Missouri, but the tallest arch in the world. Originally conceived in the 1930’s, the Arch was designed in the 1940’s, and finally built in the 1960’s. I was only in St. Louis for an evening, so obviously had very little time to explore the city. But I am glad I took the time to visit this amazing piece of architecture and engineering.
Before even arriving in St. Louis, I knew I wanted a to use the unique shape of the arch to create a few unusual and abstract compositions. But once I arrived and saw the shear size of this monument to westward expansion, I also wanted to find a way to capture the incredible scale of it. Maybe it was blind luck but I walked away from the arch with few images that I really enjoy and think capture a bit of the awesome and unique beauty that is the Gateway Arch.
Looking up the south leg of the arch. In the above image, you can barely see the windows of the observation deck at the apex of the arch.
Cheesy self portrait. Regardless of the cheese factor, it’s pretty clear the St. Louis Arch soars into the sky.
The curves of the arch make for some interesting compositions. Even though the arch is clad in stainless steel, corrosion does build up with time; the results of which are more evident in this black and white image. It really is strange how one panel can have much more corrosion than even panel right next to it!
Maybe it is my introvert personality, but I was drawn to the row of empty benches and had to take their picture. In fact, a group of street performers were just out of site to the left of this image and I carefully crafted this composition to exclude them. Besides, I wanted the street lamps in my image to have that “star burst” look, and to do so, my camera required an exposure time of of several seconds. Those moving street performers would have been nothing but blurry blobs…give and take, I guess.
As a landscape photographer, I am always stressing out over clouds. Clear blue skies are boring but total overcast is equally bad. I had spent the majority of my time at the arch under clear blue skies, but as the sun dropped below the horizon, I saw a small group of clouds drifting toward the arch. I anticipated where the clouds would pass, and waited for my opportunity. The fast moving clouds streaked across the sky during the 30 second exposure, giving the clouds a unique and more dynamic feel.
Landscapes of Charleston, South Carolina
Charleston is such a dynamic town, with beautiful parks and both stunning historic and modern architecture, if you were to only explore the historic neighborhoods of the city, you would be missing a large part Charleston that does deserve attention! After putting together a my previous blog that focused on the historic district in downtown Charleston, I immediately knew I had more to share from the city. To be totally fair, all of South Carolina is incredibly beautiful; I only had two days in South Carolina, both spent in Charleston, but I wish I could have spent more time exploring the coastal and lowland areas that surround the city. Without further adieu, here are a few of my favorite images from Charleston that are NOT of historic buildings.
Buildings of Historic Downtown Charleston, South Carolina
Although not terribly old by European standards, Charleston, South Carolina, founded in 1670, certainly is old by American standards. The city sits on a peninsula that juts into a large natural harbor, which has kept Charleston by and large, prosperous throughout most of its history. During the British colonial rule, Charleston was the richest city south of Philadelphia and considered the cultural hub of the South. After the Revolutionary War, the South, and especially the area around Charleston, relied more and more on slave labor to produce and export through Charleston, the cash crop of the day: cotton.
In order to protect the southern way of life, South Carolina was the first of the confederate states to secede from the Union. In fact, the first shots of the Civil War were fired from Charleston and the surrounding area, laying siege to Union controlled Fort Sumter, which sits at the entrance to Charleston Harbor.
For much of the Civil War, Charleston was a relative safe haven for the Confederacy, but eventually the Union was able to use long range cannons and shell the city, causing massive destruction. War was not the only thing that laid waste to the city; fire, earthquakes, hurricanes, and new construction developments have all greatly altered the look of the city over the years.
Considering how much damage–both natural and man made–Charleston has seen over its history, it is amazing how many historic structures remain. Thankfully, the residents of Charleston did realize the incredible beauty of their city and much of the old downtown area is now preserved as a National Historic District. Walking through old downtown is like taking a step back in time (that is, if you are able to ignore the automobiles).
For a photographer, countless opportunities exist for fun picture taking. I spent two days in the city and could have spent two weeks wandering just the downtown streets. Below are a few of my favorite architectural shots from Historic Downtown Charleston.
I almost didn’t take this photo; I woke before sunrise and thanks to fully overcast skies, had been shooting for several hours. With food and coffee very much on my mind, I had packed up my photo gear and was making my way back to the hotel for breakfast when I saw this pair of windows and knew I had to stop. This was actually the last picture I took in Charleston and turned out to be one of my favorites!
Photogenic windows and entryways await around every corner in this town. Each morning and evening, I hopped on my bike and slowly cruised around the neighborhoods looking for interesting photographic subjects.
The Dock Street Theater looks like it belongs in New Orleans. Well, considering New Orleans was not founded until 1718, I suppose you can argue many of the buildings in “The Big Easy” belong in Charleston! Like many historic American cities, you can find a wide variety of Architectural styles.
Recorded in 1789, 18 Church Street is the earliest known deed recorded in Charleston. Back then, as well as today, it is a private residence. I was lucky to make this photo. The home owner’s Audi was parked on the street barely out of sight to the right of this image.
A Day in Nerd Heaven…Kennedy Space Center
A month ago or so, I took a day trip to the Kennedy Space Center on the Florida coast east of Orlando. Besides photography and all things outdoors, I’m a big history buff with a special interest in the space program. When I was a very small child, I cut the back fabric off my parent’s couch because “I wanted to see what it looked like inside.” I went on to college and studied mechanical engineering, so I guess it is not terribly surprising I think NASA’s space program is one of the most significant accomplishments of man kind (and therefore really, really, cool). Seeing the launching point for the entire space program up close is truly inspiring whether you’re a big space nut or not.
Because NASA’s complex at Cape Canaveral and Cape Kennedy is so large, to see the sites, you have to take guided bus tours that take you to different areas of the complex. Being the nerd that I am, without hesitating, I signed up for the “mega tour.” The mega tour starts at the visitor center complex and takes you the Vehicle Assembly Building, the Space Shuttle launch pads, and then to an exhibit of the Apollo Saturn V rocket.
To call the interior space of the vehicle assembly building, or VAB for short, vast would still be an understatement. Nearly 530′ from the floor to the ceiling, the VAB is the fifth largest building in the world by volume.
Launch pads 39 A & B were used as the launch site for the manned Apollo missions and were then outfitted and used for the duration of the shuttle program. Ten seconds before launch, the entire contents of the water tower in the right of the above image, were dumped onto the launch tower and platform to help protect it from the immense heat of the rocket engines.
On the launch platform, the shuttle (and moon rockets that came before) sat directly above two trenches that, to prevent damage to the launch facilities, direct the flames of the rockets away from the surrounding infrastructure. Still, during a launch, the area surrounding the platform is anything but a friendly environment. Even with the flame trenches, the heat from the launch would kill anyone within 400′ of the platform. Within 800′ of the platform, the sound of the rockets firing would be so deafening, your heart would stop!
About a minute after the space shuttle was launched the main engine (big orange tank in the middle) had to be throttled back to slow down the space craft’s acceleration. If the shuttle continued to accelerate at such a rapid pace, the thick lower atmosphere of earth would have crushed the spacecraft. Only once the space craft was much higher in the atmosphere, where the air is much thinner, could the main engine be brought back to full throttle.
The diameter of each nozzle on the five rocket engines on the Saturn V rocket is more than twelve feet in diameter.
When the first stage of the Saturn V rocket was lit, the resulting noise was the loudest man made sound ever produced. Also worth noting, the VIP viewing platform for Apollo rocket launches and also during the shuttle program was three and a quarter miles away from the lunch pad. Why so far? When fully fueled, if the rocket (or space shuttle) were to malfunction and blow up on the ground, the minimum safe distance from the launch platform was three miles! In fact, there was as much explosive energy in the fully fueled space rockets as an atomic bomb!
With walls so thin, a man could easily punch through them, the lunar module carried two astronauts and landed them on the moon. The lunar module was notoriously unstable and extremely challenging to fly.
When viewing the Saturn V rocket as a whole, it is incredible how small the main space vehicle is compared to the rest of the rocket. The command module was the only part of the space craft designed to return safely back to earth (although it was not reusable). The command module was built to carry three men to and from the moon and did so with the the computing power less than a modern day simple scientific calculator.
My day at NASA was incredible; I was literally like a kid in a candy store and could have easily spent several days exploring the complex at Kennedy Space Center. As our space program continues to evolve, with the Special Launch System (SLS) in development, along with the rovers we’ve sent to mars, and satellites and probes we’ve sent into space, the story that is the United States space program is far from complete. I’m sure I will be back to visit again…
Dry Tortugas National Park
In January, I was asked to manage a 6 month project in south Florida. Living in the Rocky Mountains and being an avid skier, moving to a sub tropical climate in the middle of the winter was honestly a hard decision to make. In the end, I decided a short term move to Florida would make a great adventure. Before moving down to Boca Raton, Florida, I researched outdoor activities and attractions in the area and it became immediately clear that a visit to Fort Jefferson in Dry Tortugas National Park was on the top of my “to do” list.
I always thought the end of the Florida Keys was at Key West; well, the roads end there, but seventy miles further west sit the Dry Tortugas, the true end of the Florida Keys. On Garden Key, sits the massive Fort Jefferson; the third largest coastal defense fort in the United States and, with over 16 million bricks, the largest masonry built structure in the Americas. Although accessing the fort is very easy thanks to the Yankee Freedom ferry, access at my favorite times to photograph, sunrise and sunset, is a bit more challenging. With the Yankee Freedom arriving at the island each day at mid morning, and then leaving mid afternoon, an overnight stay was in order. As luck would have it, very limited primitive camping is provided on the island and I booked a two night stay in the first week of June.
Upon arriving on the island, I began running around scouting locations to come back to and photograph when the light was better. I was immediately drawn to this small section along the moat wall where the original brick pavers were still covering the top of the wall (most of the top has been “restored” by pouring concrete in place of replacing the brick pavers). I noticed this stretch of moat wall pointed due west, and knew the sun would set at the end of the wall, making for a powerful image.
The parade ground of the fort is 18 acres. At the height of the fort’s use, nearly two thousand soldiers and their families lived on this parade ground. During and after the Civil War, Fort Jefferson was used as a prison, even housing the conspirators of the Lincoln assassination.
Over 16 million bricks were used to build hundreds of arches throughout the fort. All of these arches make for countless photographic opportunities,
Everything man made on Garden Key is in one state of decay or another.
Although the fort takes up the majority of Garden Key, there are two beaches that offer spectacular snorkeling.
I must say, after spending two nights on this very small and remote island, I was ready to get on the ferry, take a shower, and head home. However, I already would love to go back. Even if you only have time to do a day trip to Dry Tortugas National Park, go and see it! You will not be disappointed!